


Product Installation

Product setup is very straightforward. The setup will install the component, help, demos and sample project files. All versions of Visual Studio are supported the products are automatically registered into the Visual Studio toolbox.
Step 1
For the purpose of this guide we will assume the VisualStyler product is being installed, Begin by running the product setup executable. Please close all open instances of Visual Studio before running the setup. After the setup has finished, open an existing Windows Forms .Net project or create a new one.
Step 2
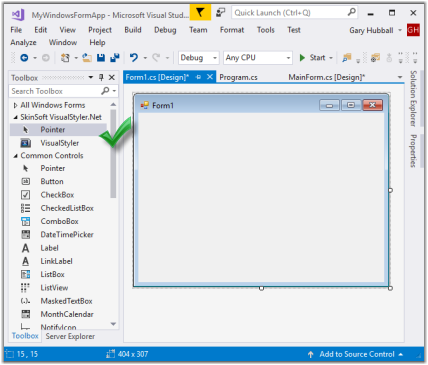
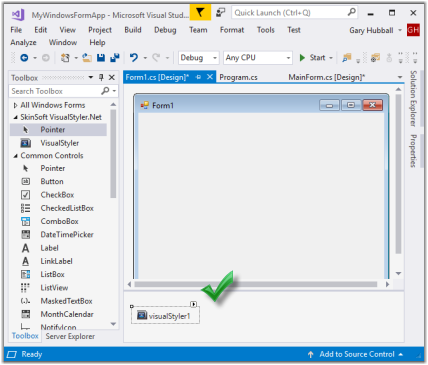
Open the main application form in the forms designer, and you will notice a new toolbox tab 'SkinSoft VisualStyler.Net' and component item. Drag the component onto the form, you will notice the component is placed in the Visual Studio component tray
Step 3
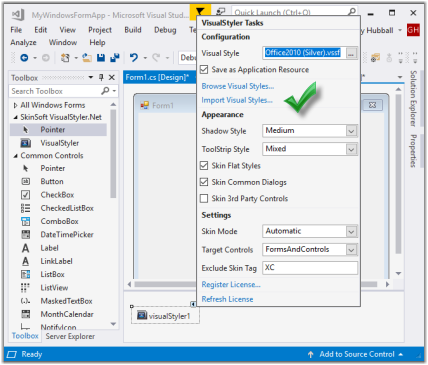
Click on the component and bring up
the Visual Studio properties window.
You can now customize the component. There should only be one instance of the component in your application, this is usually on the main form.
After installation, you can upgrade to the latest version (if available) at anytime by simply downloading the new version from our website.